Troubleshooting the Thumb for SaeboFlexUpdated 4 months ago
Many therapists have indicated that fitting the thumb is one of the most problematic areas. Below are some recommendations and helpful tips that may improve your success in properly fitting and positioning the thumb.

1. Digit Cap
It is very important that you have the proper sized Digit Cap for the thumb. In order to correctly measure your patients’ Digit Caps, it is essential that they trim their nails before assessing.
Remember:
- The Digit Cap should fit snug so that the tip of the thumb makes contact with the end of the Digit Cap. If the client’s thumb does not make contact with the end of the Digit Cap, and the next larger size feels a bit loose, pad the roof of the Cap with self-adhesive closed cell foam padding (1/8” or 1/16”).
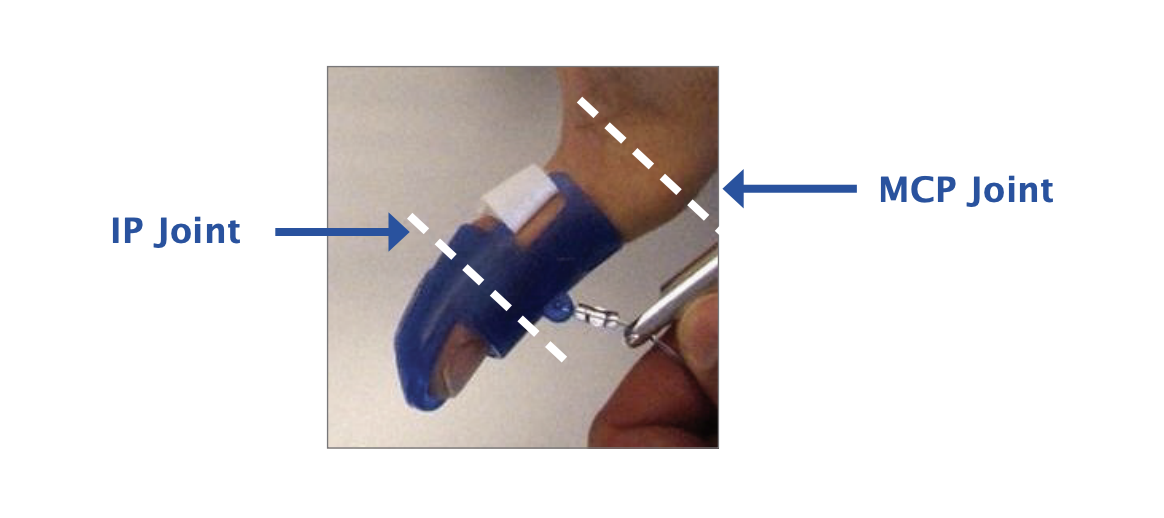
- The length of the Cap should be long enough to block IP flexion, with the proximal edge coming as close to, but not covering, the MCP joint of the thumb. If the Digit Cap is not long enough, the IP joint will flex resulting in pressure over the dorsum of the IP joint and compromise the effectiveness of the thumb position for grasping.
2. Thumb Assembly
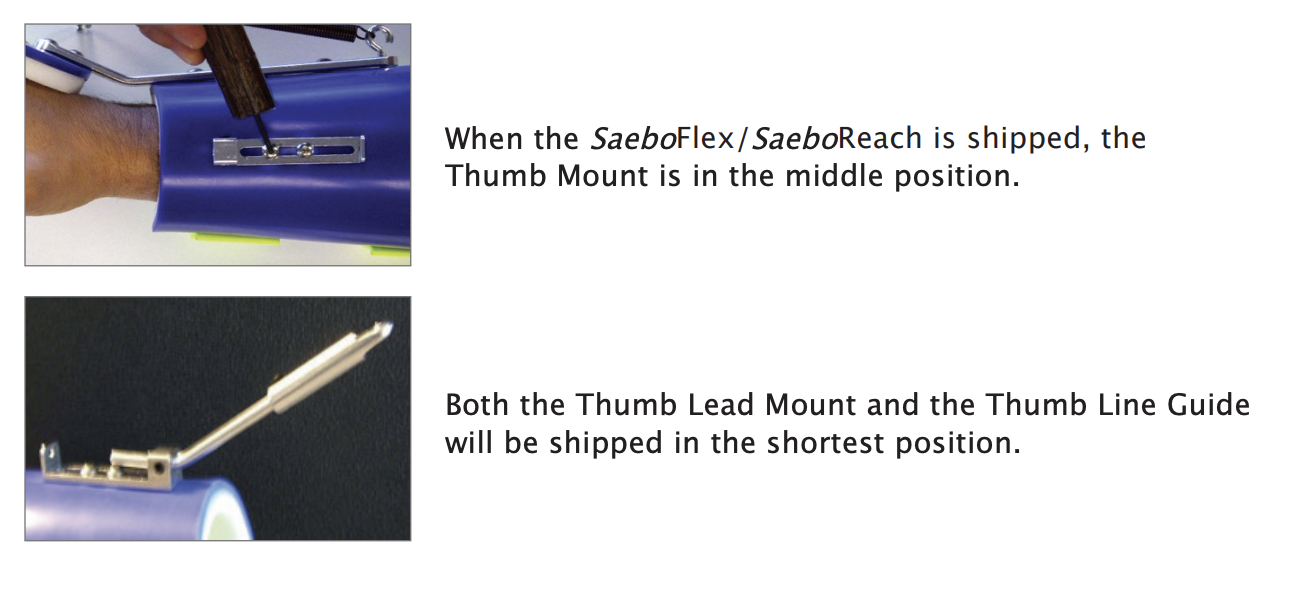
The Thumb Assembly consists of 3 parts: the Thumb Mount (attached to the forearm shell), the Thumb Lead Mount (bar with the bent angle), and the Thumb Line Guide (hole on the end where the line passes through).
The Thumb Assembly allows for length adjustments (both in a proximal and distal direction) as well as rotational adjustments, which allows for positioning the thumb in a radial or palmar direction.
3. Thumb Fitting
Optimal Position
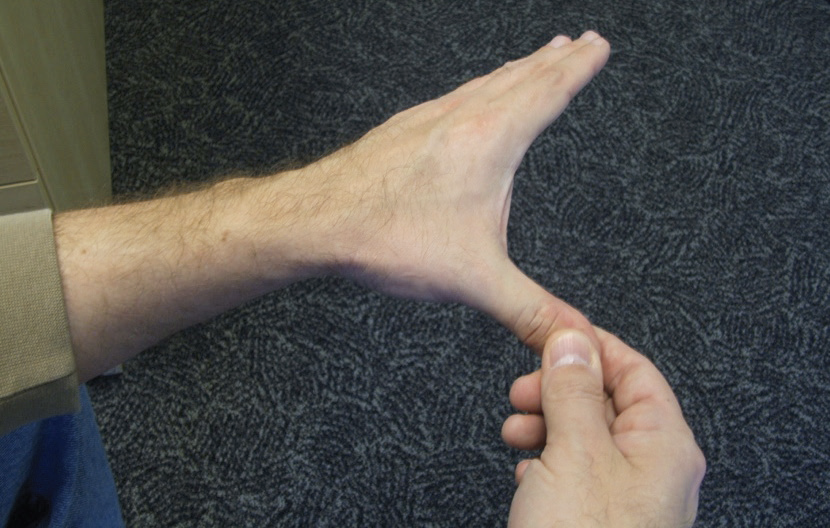 | The desired position for the thumb is halfway between palmar and radial abduction, or otherwise known as “thumbtion”. In this position, the web space is on maximum stretch, and the MCP joint is fully extended (there should not be slack at the web space). |
 | Step 1: Remove the Thumb Lead Mount and loosen the Allen screws on the Thumb Mount. |
 | Step 2: Don the thumb Digit Cap. Passively place the thumb in the desired position of “thumbtion” with the web space on stretch and the MCP extended. |
 | Step 3: Place the Thumb Lead Mount back into the Thumb Mount. Rotate the Thumb Lead Mount up or down so it aligns with the position of the thumb. |
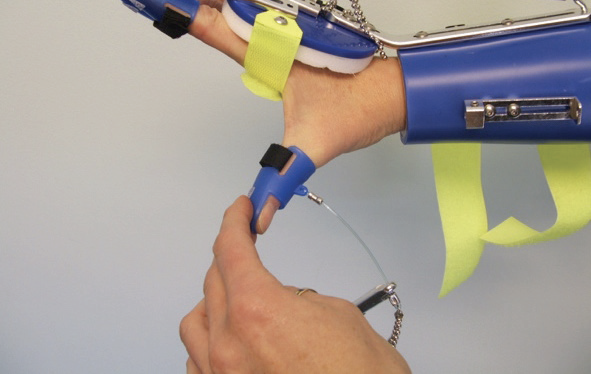
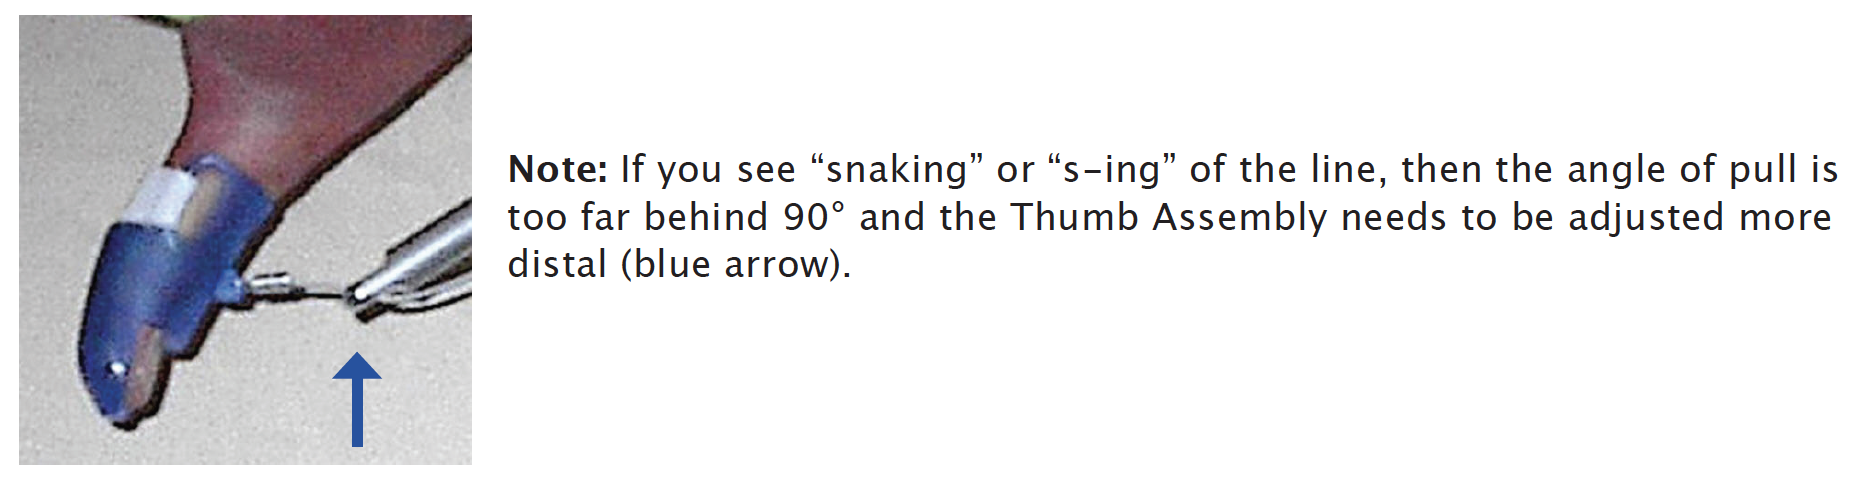
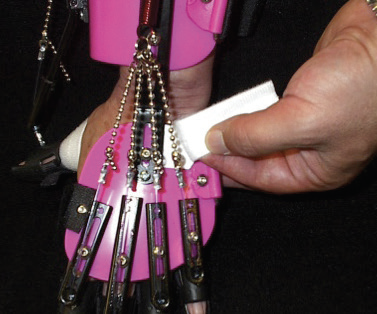
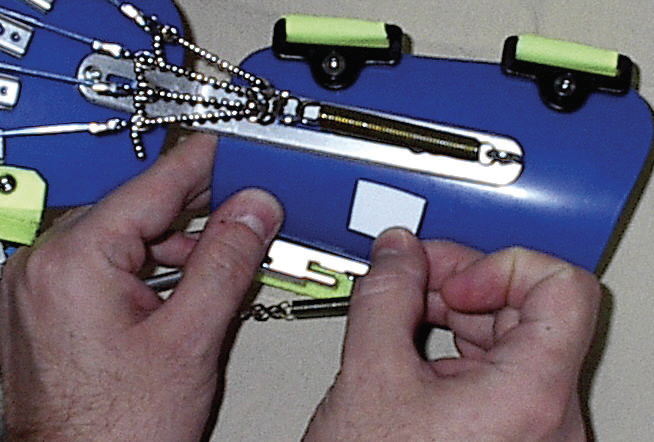
 | Step 4: Make sure the crimp is making contact with the Thumb Line Guide (blue arrow) To set the angle of pull just behind 90°, you will next adjust the overall length of the Thumb Assembly and shorten the Bead Line appropriately. |
Note: Since the Thumb Lead Mount and the Thumb Line Guide are assembled and shipped to you in the shortest position, the only place you can shorten the Thumb Assembly is by sliding the Thumb Mount proximal on the Forearm Shell. This will help position the thumb further proximal to apply an adequate stretch on the web space.*
*In looking at tech support photos submitted by therapists, a majority of clinicians do not have an adequate stretch on the web space because they failed to move the Thumb Mount proximally.
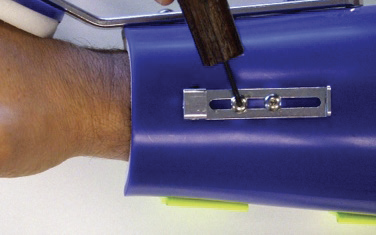
4. Bending the Thumb Lead Mount
If your client has a large hand or a long thumb, you may have to bend the Thumb Lead Mount to increase the angle and provide optimum stretch on the web space.
Steps:
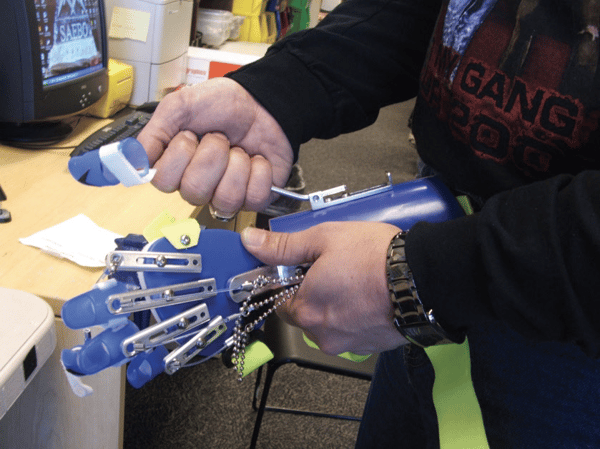
1. Remove the Saebo Flex from the patient’s arm.
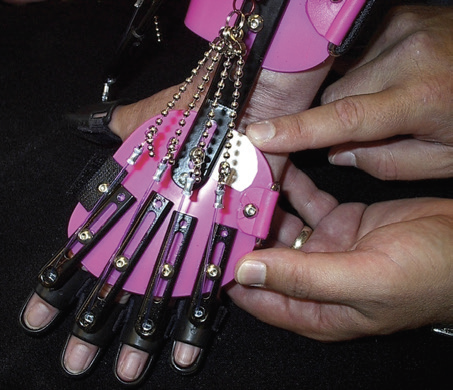
2. Position the Thumb Mount and the Thumb Lead Mount in the shortest position.
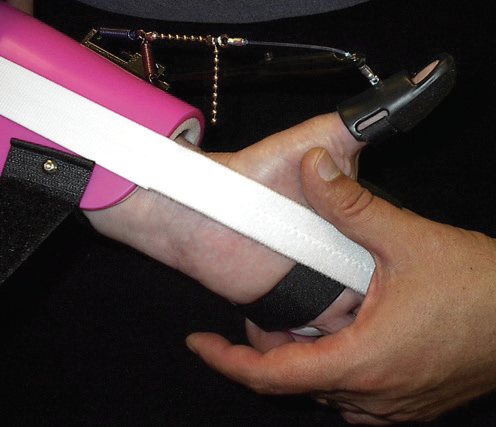
3. Hold the Saebo Flex in one hand and grab underneath the Thumb Lead Mount with the other hand.
4. Pull the Thumb Lead Mount towards you to bend and increase the angle.
5. If you bend it too far, you can always push down on the Thumb Lead Mount to decrease the angle.
Note: It is not necessary to greatly increase the angle; a simple 5-10˚ is often sufficient.
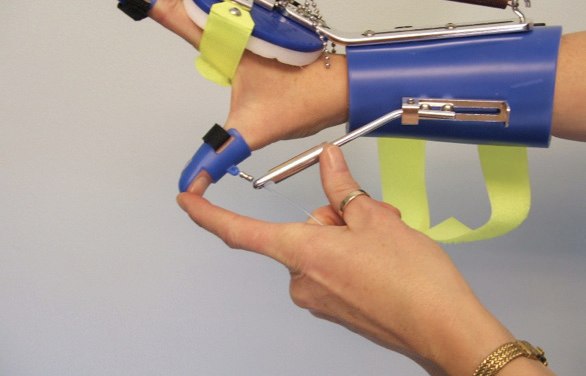
5. Setting the Angle of Pull
It is recommended that the angle of pull on the thumb should be just behind 90° (approximately 80°).
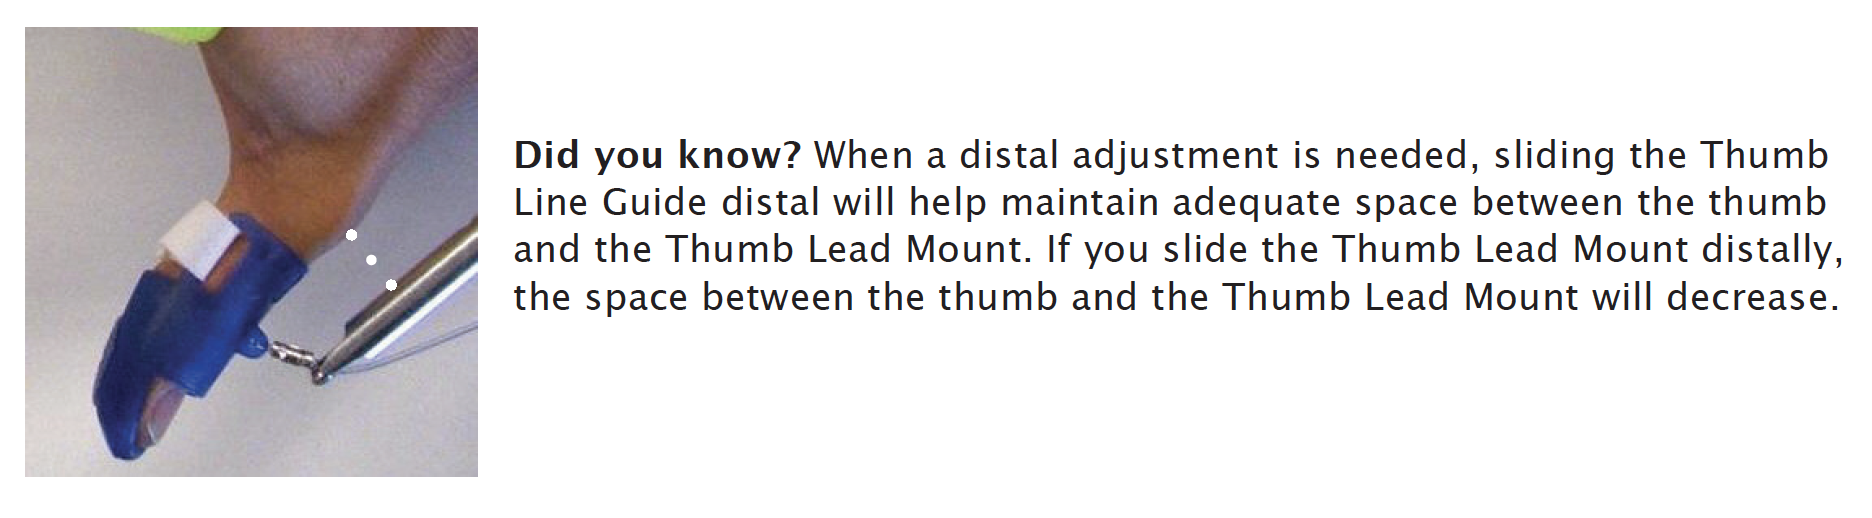
To set the angle of pull further distal (just behind 90°), slide the Thumb Lead Mount and/or Thumb Line Guide distal. The amount of additional length needed to set the angle of pull will determine where you make the length adjustments.
For instance, if you need just a little more length, slide the Thumb Line Guide distal. Conversely, if a larger adjustment is needed, consider sliding the Thumb Lead Mount first, then slide the Thumb Line Guide for fine-tuning.
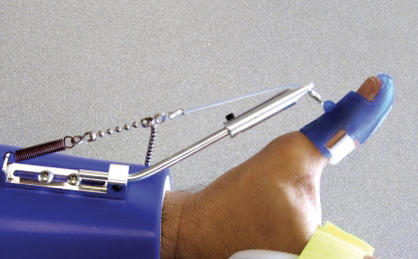
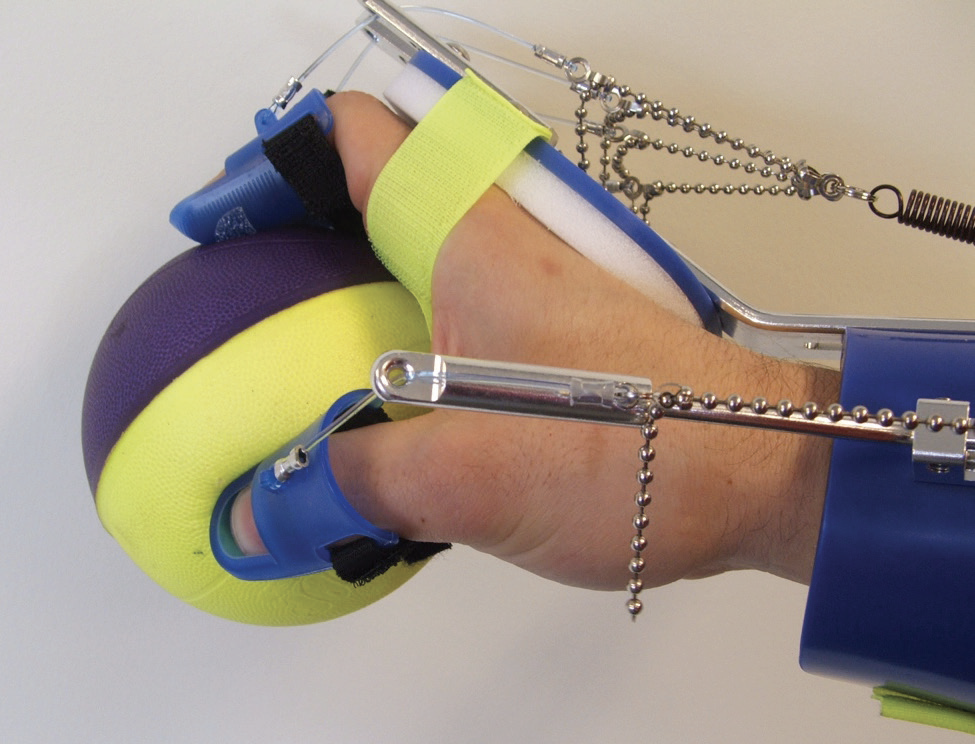
6. Positioning the Ball for Grasping
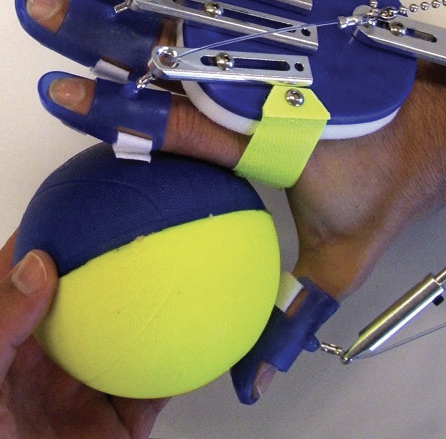 To assess the overall fit and thumb position, the client should grasp the ball while seated. When positioning the ball for grasping, half to 1/3rd of the ball should be exposed in the web space. The thumb and index finger should make contact with the ball prior to the client grasping.
As your client grasps the ball, you are observing for finger contact, finger deviation, and thumb contact and/or deviation.
When your client relaxes or “stops squeezing”, observe how long it takes to let go of the ball. If the client takes longer than 10 seconds to let go of the ball after 3 or 4 attempts to relax, consider shortening the bead line. If shortening the bead line does not work, then switch to a stronger spring.
Note: Support the client’s forearm with one hand while positioning the ball with the other hand. Do not have the client attempt the first few grasps without his or her forearm supported. The added support is needed to reduce the amount of tone that may occur with active shoulder exertion.
7. Applying a Thumb Strap
If the client exhibits thumb deviation or hyperextension, he or she may display one or more of the following:
A. Joint Laxity (MCP Flexion/Extension)
B. Joint Laxity (MCP/IP Lateral Instability)
C. Excessive Hypertonicity of the Flexor Pollicis Longus (FPL)
A. Joint Laxity - MCP Flexion/Extension
A hypermobile MCP joint may result in flexion of the MCP joint or volar subluxation of the MCP joint. If either of these occur, consider applying a Thumb Strap; every device will be shipped with 1 strap included. If an additional Thumb Strap is needed, you can order one using the Miscellaneous Parts Ordering Form.
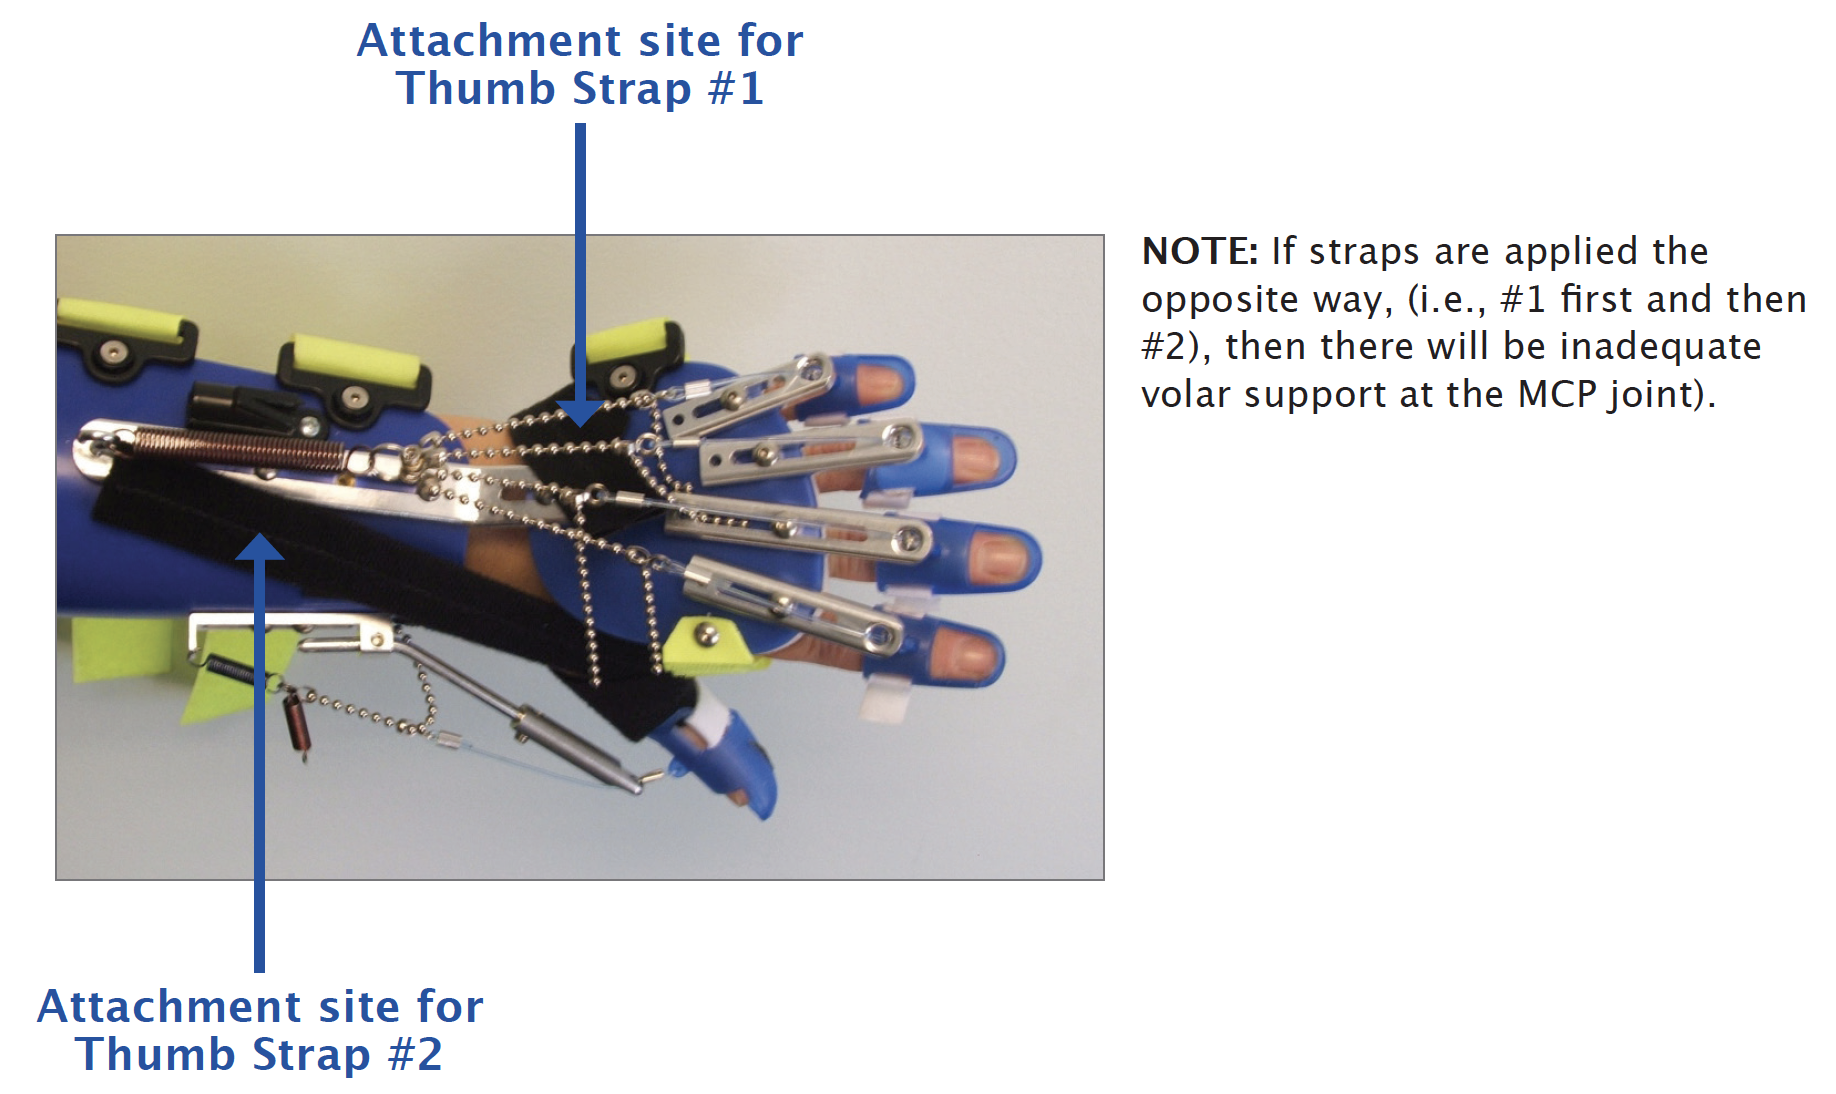
Thumb Strap #1
This strap is used if the MCP joint is flexing during grasp (blue arrow).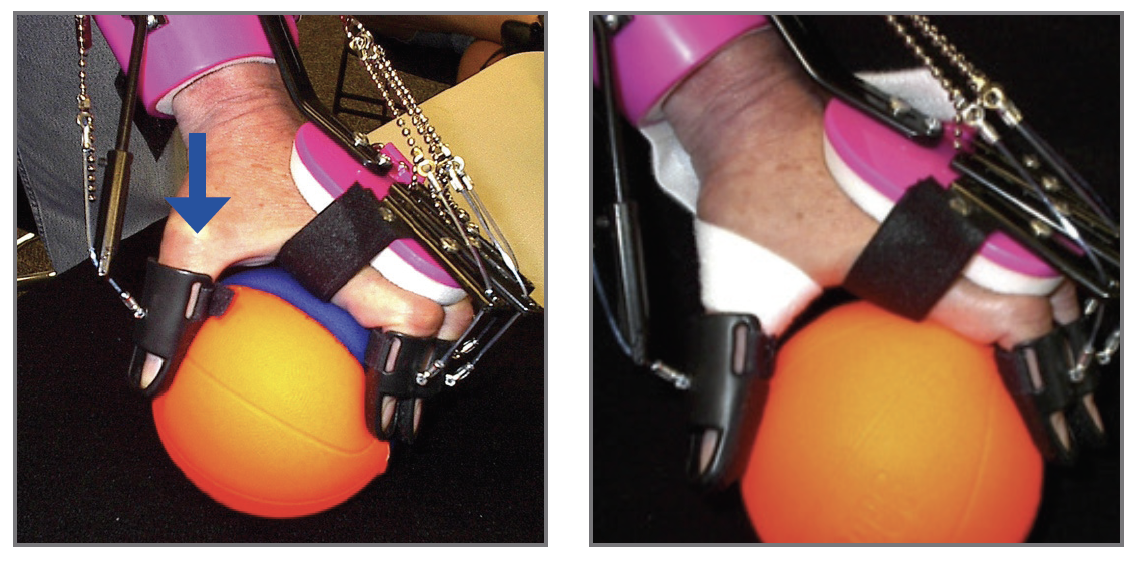
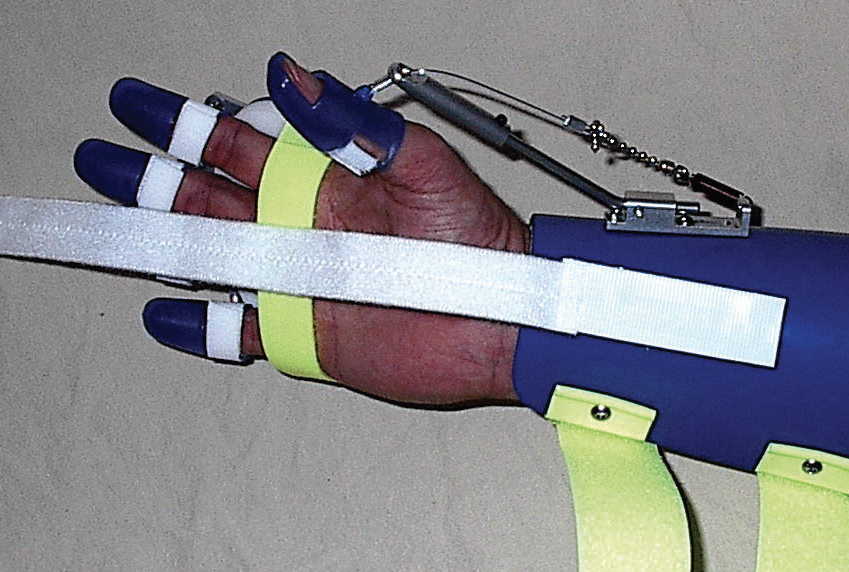
 | Step 1: Trim a ½” piece of the adhesive back velcro from the end of the Thumb Strap and place on the ulnar side of the Dorsal Hand Piece between the D-ring and the distal end of the Wrist Mount. |
 | Step 2: The remaining adhesive section of the Thumb Strap will be placed on the volar surface of the Forearm Shell. Make sure the end of the adhesive material is right at the distal edge of the Forearm Shell. |
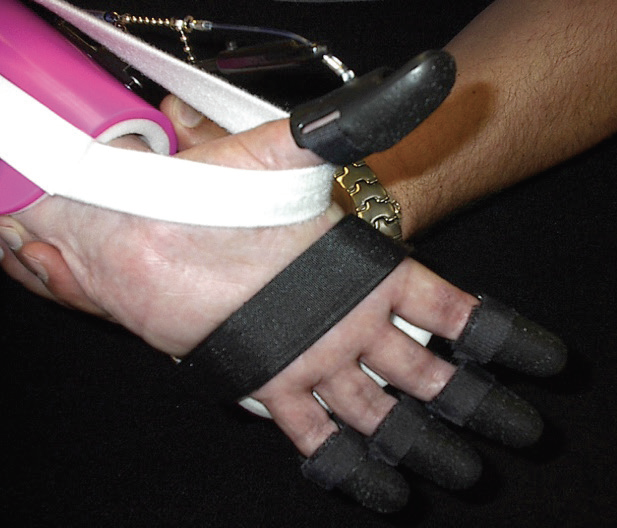 | Step 3: Wrap the Thumb Strap around the MCP, over the palmer surface and through the web space. |
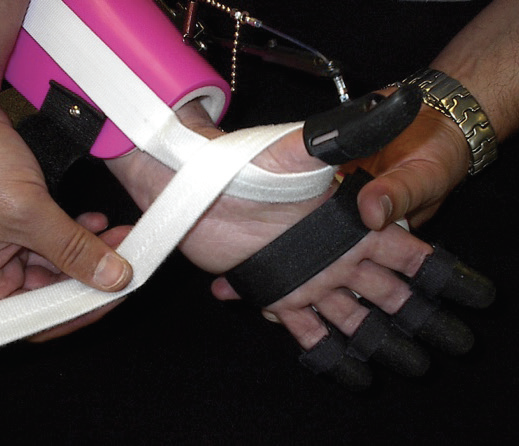 | Step 4: Pull the Thumb Strap around to the ulnar side of the Dorsal Hand Piece. |
 | Step 5: Attach strap to the piece of hook. |
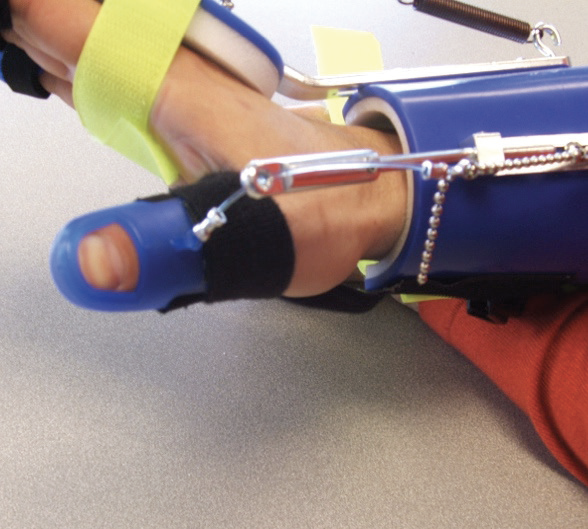
Thumb Strap #2
This strap is used for MCP joint volar subluxation resulting in hyperextension of the MCP joint during grasp.
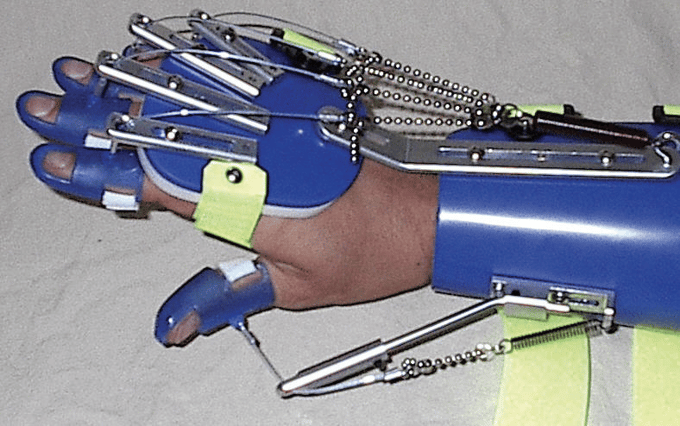 |  |
 | Step 1: Place a small piece of adhesive back hook onto the dorsal surface of the Forearm Shell between the Wrist and Thumb Mounts. |
 | Step 2: The remaining adhesive section of the Thumb Strap will be placed on the volar surface of the Forearm Shell. Make sure the end of the adhesive material is right at the distal edge of the Forearm Shell. |
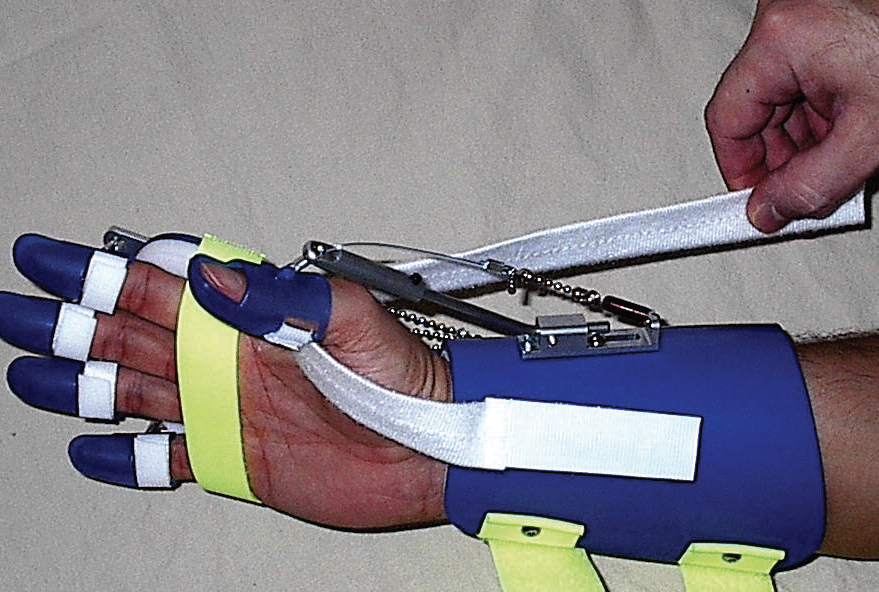 | Step 3: Pull the Thumb Strap through the web space towards the small piece of hook on the dorsum of the Forearm Shell. Make sure there is adequate tension on the strap. |
 | Step 4: Attach the Thumb Strap to the Velcro hook on the dorsal side of the Forearm Shell. |
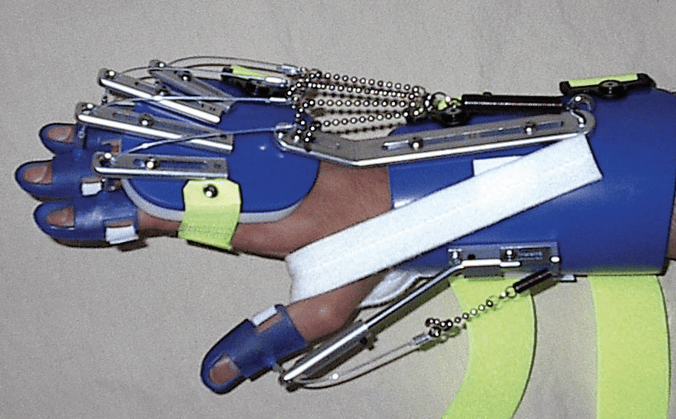
Thumb Strap #3
For those individuals that have significant joint laxity at the MCP, they may need 2 Thumb Straps to provide adequate stability. Thumb Strap #3 is a combination of Thumb Strap #1 and #2.
Thumb Strap #2 is applied first followed by Thumb Strap #1. This will offer support under the MCP and prevent/minimize subluxation following the application of Thumb Strap #1.
B. Joint Laxity – MCP/IP Lateral Instability
If the MCP or IP joint is laterally unstable or hypermobile, it may result in lateral deviation. If this occurs, consider fabricating a thermoplastic thumb block (see below example) or short thumb spica. In addition to the thumb block, also consider applying a Thumb Strap if needed.
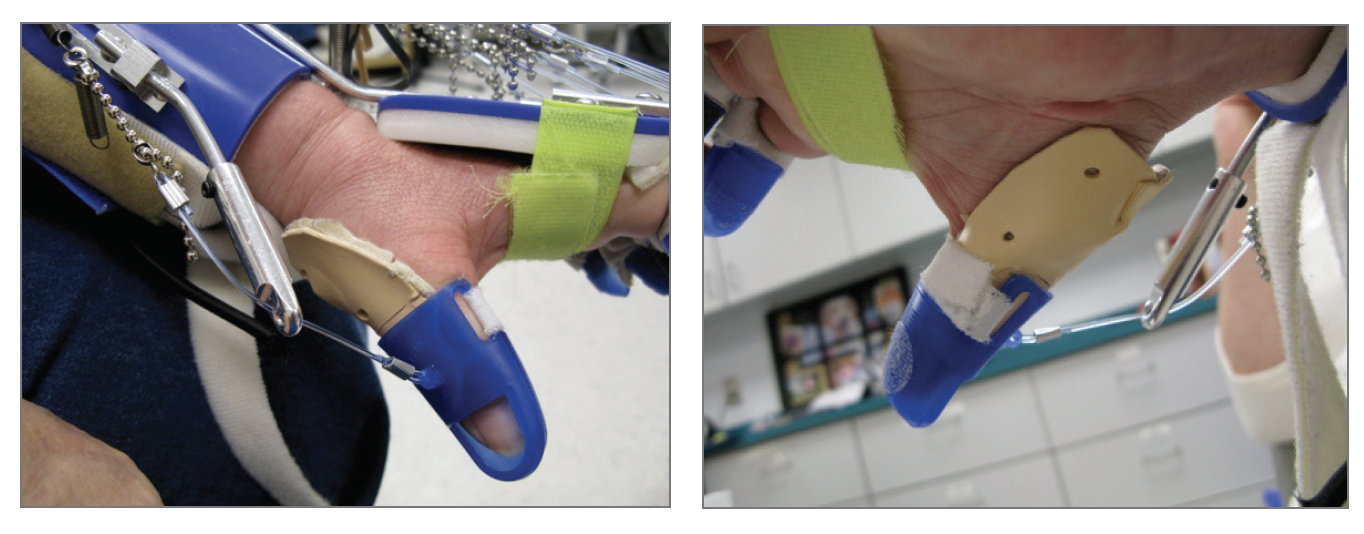
C. Excessive Hypertonicity of Flexor Pollicis Longus (FPL)
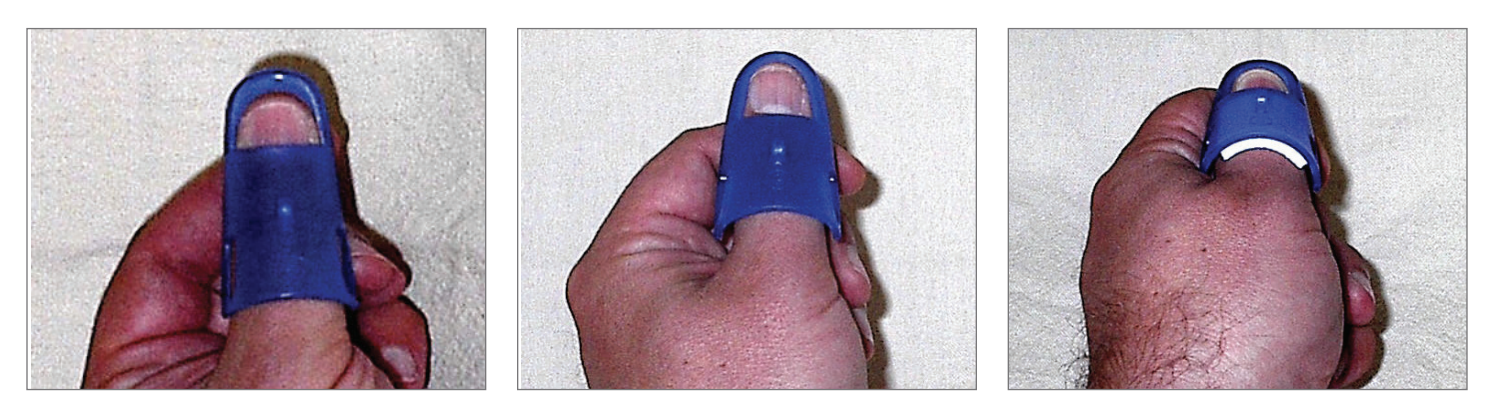
Even if the Digit Cap is sized correctly, a client may flex at the IP joint when attempting to grasp due to of a very strong FPL. This will result in the proximal edge of the Digit Cap “lifting” off the thumb as seen below.
In this instance, strategies that essentially “immobilize” the thumb should be considered.
Techniques include:
1. Switch to a stronger Thumb Spring.
2. Shorten the Bead Line.
3. Try Thumb Strap #1, #2 or both. Consider applying 2 Thumb Strap #1’s (see additional tip below)
4. Use a longer thumb Digit Cap.
 | To help keep the proximal edge of the Digit Cap from lifting off the thumb, try applying a small strip of adhesive hook Velcro to the dorsal proximal edge of the Digit Cap (see arrow). |
 | Then, apply Thumb Strap #1 taking care to secure the edge of the Thumb Strap to the Velcro on the Digit Cap. |
 | Once you secure the end of the Thumb Strap to the ulnar side of the Dorsal Hand Piece, the strap will help prevent the Digit Cap from lifting off the thumb proximally. |